Imagine walking into your newly renovated bathroom, gleaming white tiles stretching across the floor, only to discover a tiny gap between the tile and the baseboard. It’s a gap that seems insignificant, almost invisible, but it has the potential to turn into a haven for grime, dust, and even mold. Now, picture that same bathroom, with the gap flawlessly sealed with a neat bead of caulk. The tile appears seamless, the baseboard looks pristine, and the room radiates a newfound sense of cleanliness and elegance. It’s a subtle detail, but it makes a world of difference. So, the question arises: do you caulk between tile floor and baseboard?

Image: www.mfinelumber.com
The answer, like many things in the world of home improvement, is complicated. It depends on a multitude of factors, ranging from the nature of the materials used to the specific circumstances of your home. But fear not, because this article will shed light on this perplexing question, equipping you with the knowledge and understanding you need to make the right decision for your situation.
Why Caulk Between Tile and Baseboard?
There are several compelling reasons why caulking between tile floor and baseboard can be a smart move. First and foremost, it creates a watertight seal, preventing water from seeping into the gap and causing damage to your subfloor. This is particularly important in areas like bathrooms and kitchens, where spills and splashes are common. In addition, the caulk acts as a barrier against dirt, dust, and debris, preventing these unwanted substances from accumulating in the gap and making cleaning a nightmare.
Beyond practicality, caulking between tile and baseboard can also enhance the aesthetic appeal of your room. A smooth, seamless transition between the tile and the baseboard creates a more polished and sophisticated look, elevating the overall design of the space. Think of it as the finishing touch, a subtle but impactful detail that can make a big difference.
When You Should Caulk Between Tile and Baseboard
So, when exactly should you caulk between tile floor and baseboard? Here are some key scenarios where it’s highly recommended:
- Bathrooms: Bathrooms are inherently prone to moisture and spills, so caulking is essential to protect the subfloor and prevent mold growth.
- Kitchens: Similar to bathrooms, kitchens see their fair share of spills, meaning caulking is crucial to maintain a clean and sanitary space.
- Basements: Basements are often susceptible to dampness and humidity, making caulking a prudent choice to prevent water damage and improve the overall look of your basement.
- Large Gaps: If there’s a considerable gap between your tile and baseboard, caulking is a necessity, not only to seal it but also to create a visually pleasing transition.
- Uneven Tile: If your tile floor isn’t completely level, caulking helps create a seamless appearance, masking any minor imperfections.
When It’s Not Necessary to Caulk
Just as there are times when caulking is a good idea, there are also situations where it might not be necessary. Here’s a breakdown of those scenarios:
- Small Gaps: If the gap between the tile and baseboard is tiny, barely noticeable, you might be able to get away with skipping the caulk. However, it’s always best to err on the side of caution, especially if you’re dealing with areas prone to moisture.
- No Moisture Issues: If your space is relatively dry and unlikely to experience water splashes or spills, you may not need to caulk. However, consider the long-term implications. Over time, even the smallest gaps can become pathways for dirt and dust.
- Unsealed Tile: If your tile is unsealed, it’s generally recommended to caulk between the tile and baseboard to provide additional protection from moisture penetration.

Image: flooringwest.com
Different Caulking Techniques
Caulking between tile floor and baseboard is a relatively straightforward task, but there are a few things to keep in mind to ensure a smooth and successful application.
1. Preparation is Key
Before you start caulking, it’s essential to prepare the surface properly. Here’s a step-by-step guide:
- Clean the Surface: Ensure the tile and baseboard are free of dirt, debris, and any loose particles. Use a damp cloth or a mild detergent to clean the surfaces thoroughly.
- Let it Dry Completely: Allow the tile and baseboard to dry completely before proceeding. Moisture can interfere with the adhesive properties of the caulk,
leaving you with a weak and messy seal. - Apply Painter’s Tape: To achieve a neat and precise caulking line, use painter’s tape to mask the edges of the gap. Apply the tape carefully, ensuring it’s straight and secure.
2. Choosing the Right Caulk
The type of caulk you choose is crucial to ensure a strong and durable seal. Here are some factors to consider when selecting the right caulk:
- Material: Silicone caulk is a popular choice for tile floors as it’s waterproof, mildew-resistant, and flexible. It’s also easy to apply and clean up. However, silicone caulk is not paintable, so if you plan to paint the baseboard later, you’ll need to choose a different type.
- Color: Select a caulk color that blends seamlessly with the tile and baseboard, or opt for a color that complements the overall color scheme of your room.
- Application: Choose a caulk that’s specifically designed for sealing gaps between tile and baseboard.
3. Applying the Caulk
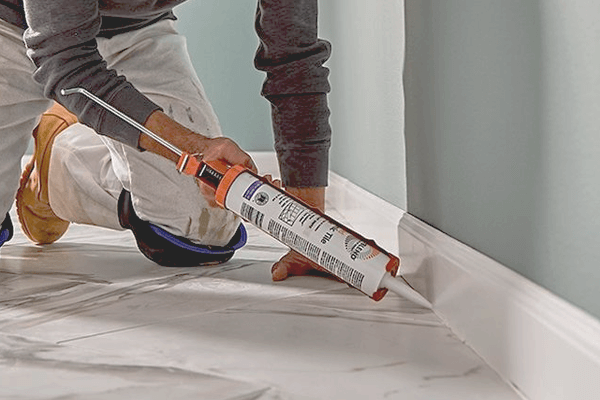
Once you have the right type of caulk, it’s time to apply it. Here’s a step-by-step guide on how to apply caulk between tile and baseboard properly:
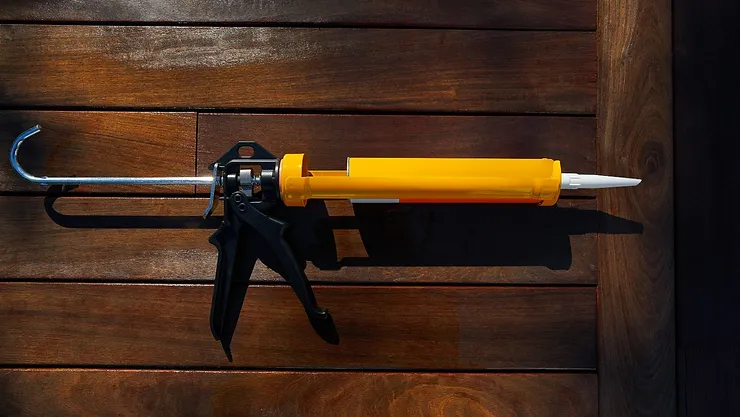
- Cut the Nozzle: Cut a small hole at the tip of the caulk tube and insert the tube into your caulk gun.
- Apply the Caulk: Hold the caulk gun at a 45-degree angle and apply a continuous bead of caulk along the gap between the tile and the baseboard.
- Smooth it Out: Use a damp finger or a caulk tool to smooth out the caulk, removing any air bubbles and creating a smooth, even line.
4. Cleaning Up
After applying the caulk, remove the painter’s tape immediately while the caulk is still wet. This will prevent the tape from sticking to the caulk.
To remove any excess caulk, use a damp cloth or a caulk tool. Make sure to clean up any drips or spills immediately. It’s also a good idea to wait for the caulk to dry completely before applying a sealant or paint to the baseboard, if desired.
Expert Tips for a Flawless Finish
Here are some additional tips from experienced flooring professionals that can help you achieve a flawless caulking job:
- Practice Makes Perfect: If you’re new to caulking, it’s a good idea to practice on a scrap piece of tile or wood before tackling your actual project.
- Work in Small Sections: If you’re caulking a large area, it’s best to work in small sections to avoid the caulk drying out too quickly.
- Use a Level: To ensure a straight and flawless line, use a level to guide your caulk application.
- Don’t Over-apply: Applying excessive caulk will result in a messy and uneven finish. Avoid pushing the caulk too deep into the gap.
Do You Caulk Between Tile Floor And Baseboard
Conclusion
Caulking between tile floor and baseboard is a valuable technique that can significantly enhance the longevity, appearance, and overall appeal of your home. By following these tips and guidelines, you can confidently apply caulk like a pro. Remember to choose the right type of caulk for your project, prepare the surfaces properly, and take your time to achieve a neat and smooth finish. Now, go forth and conquer those gaps with confidence, knowing your home will benefit from the added protection and enhanced aesthetic appeal.

:max_bytes(150000):strip_icc()/OrangeGloEverydayHardwoodFloorCleaner22oz-5a95a4dd04d1cf0037cbd59c.jpeg?w=740&resize=740,414&ssl=1)


