Imagine this: you’re knee-deep in a home renovation project, excited to lay down some beautiful new laminate flooring. You’ve carefully measured, prepped the subfloor, and even laid down a moisture barrier. Now, you’re ready to start laying those planks, but a nagging question creeps into your mind: “How in the world do I start the first row?” It can be daunting, but don’t worry! Starting the first row of laminate flooring is a crucial step, but it doesn’t have to be complicated. With a little guidance, you can lay down that first row perfectly and create a beautifully finished floor.

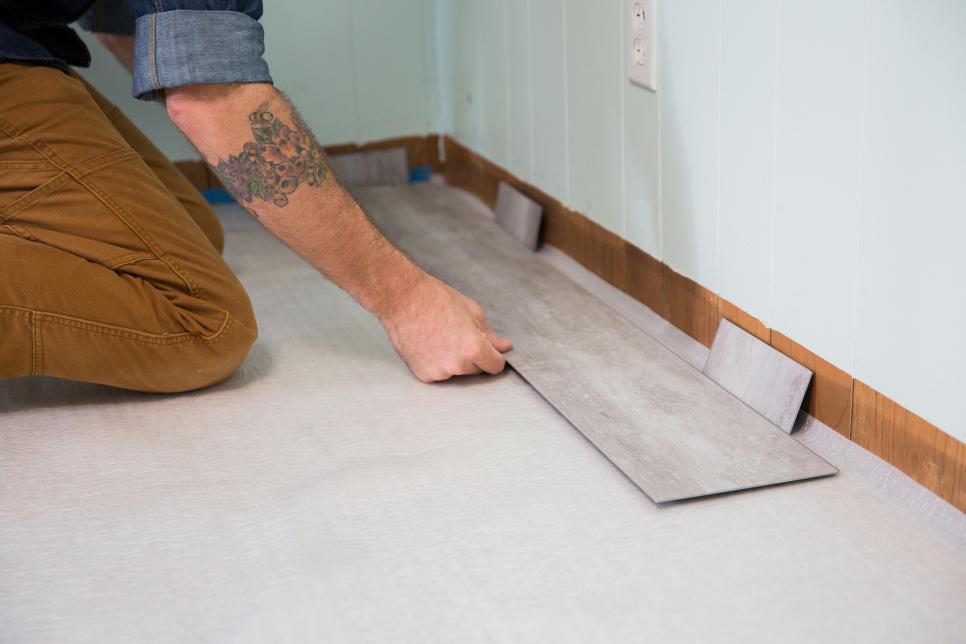
Image: flooring.sampoolman.com
Laying laminate flooring is a DIY project that can be tackled by anyone with a little time and patience. It’s a great way to update your home’s look and feel without breaking the bank. The first row of planks will set the foundation for the entire flooring project, so getting it right is vital. This guide will walk you through the essential steps and tricks to help you successfully lay down that crucial first row.
Understanding the Basics of Laminate Flooring
Before diving into the nitty-gritty of starting the first row, let’s take a quick look at how laminate flooring works. Laminate flooring is made up of several layers, which are:
- Wear Layer: This is the top layer, providing protection from scratches, stains, and fading. It’s often made from aluminum oxide, which is incredibly durable.
- Decorative Layer: This layer gives the laminate plank its unique appearance, mimicking the look of natural materials like wood, stone, or tile.
- Core Layer: This layer is made from high-density fiberboard (HDF) or medium-density fiberboard (MDF) and provides structural support for the plank.
- Balance Layer: This layer helps to stabilize the plank and prevent warping.
- Attached Underlayment: Some laminate planks come with an attached underlayment, which provides a layer of cushioning and sound insulation.
Installing a Moisture Barrier
Before laying down your laminate flooring, it’s essential to prepare your subfloor properly. One critical step is installing a moisture barrier. This barrier is critical in preventing moisture from seeping up from the subfloor and damaging your new laminate flooring. You can use 6-mil plastic sheeting or a specialized moisture barrier underlayment. Make sure the moisture barrier is laid out smoothly and overlaps each section by at least 6 inches, creating a seamless barrier.
Laying Down the First Row: The Secret to Success
Now, let’s get into the heart of this guide: starting the first row of your laminate flooring. It’s all about precision and making sure everything lines up perfectly. Here’s how to make that happen:

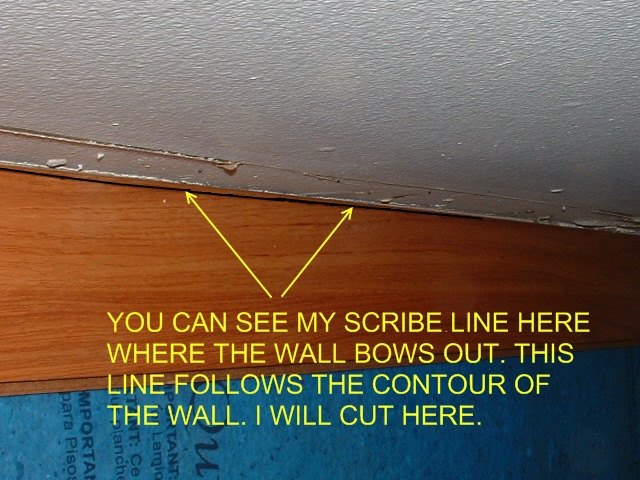
Image: www.laminate-flooring-installed.com
1. The Wall Distance and Expansion Gap
An essential step is leaving an expansion gap between the laminate flooring and the walls. This gap allows the floor to expand and contract naturally with changes in temperature and humidity. Most manufacturers recommend a gap of about 1/4 inch to 1/2 inch. Use spacers to maintain this uniform gap along the walls. Remember that gaps are essential for floor movement, so don’t be tempted to leave smaller gaps or use undersized spacers.
2. The Starting Point: The First Plank
It’s time to lay down your first plank. If you’re starting in a corner, select a plank, measure and mark the length of the plank so that it leaves the correct expansion gap at the wall. You’ll likely need to cut the plank at a 45-degree angle to create a perfect fit.
Use a straight edge and a utility knife to score a line along your marked length on the plank’s underside. Then, apply even pressure to snap the plank along your score line. This method ensures a clean break without splintering. Secure this first plank using a tapping block and rubber mallet. Apply gentle but firm taps to secure the plank.
You can use spacers along the edges of the first plank to help maintain the wall distance consistently.
3. The Second Plank and Beyond
Once the first plank is set, you’re ready to install the second plank. Again, carefully measure and cut the second plank so that it fits properly along the first plank and leaves the necessary expansion gap at the wall. The key to success here is interlocking the planks correctly.
If you’re using a click-lock system, snap these planks together following the manufacturer’s instructions. If you’re working with a glue-down system, apply a bead of glue to the tongue of the plank and press the plank into place. You’ll hear a distinct click when the planks lock together properly.
4. Tapping with a Block and Mallet
As you continue adding planks, make sure you’re tapping them together securely using a tapping block and rubber mallet. The tapping block provides even pressure while tapping so that you don’t damage the interlocking system. This process is crucial for ensuring your laminate floor is stable and solid. Apply gentle pressure while tapping, as too much force can damage the planks, leaving them vulnerable to cracking or breaking.
Be sure to periodically check that the planks are locking correctly together. If something feels off, gently detach and re-attach the plank to ensure a secure fit.
Managing the First Row: A Closer Look
The first row of laminate flooring deserves a little extra attention. You want to make sure it’s perfectly aligned and level before you build on it.
Here’s a helpful tip: Use a level to ensure each plank is level throughout the entire row. This will create a solid foundation for the rest of the installation. If you notice any inconsistencies, gently lift and adjust the plank. Don’t hesitate to use a small shim to raise a plank that is slightly lower than the others.
5. Cutting For Corners, Doors, and Other Obstacles
As you lay down the laminate planks, you’ll likely encounter corners, doorways, and other obstacles. In these cases, you need to carefully cut the planks to fit. For corners, use a standard construction saw to cut the plank at a 45-degree angle for a clean mitered edge.
For doorways, you may need to measure, cut, and fit multiple planks to create a smooth transition. Use a jigsaw or hand saw for precise cuts in confined spaces.
Expert Advice for a Successful Laminate Floor Installation
There is a wealth of information available on online forums like Reddit or in home improvement blogs, where other home improvement enthusiasts share their advice and tips. You can find tips on how to fix common mistakes and troubleshoot any challenges.
One thing to keep in mind is the importance of using the correct cutting tools. If you’re not confident in your skills with a handsaw, it’s worth investing in a circular saw and a track guide for accurate and consistent cuts. You can also find specialized cutting tools for laminate flooring that can make the process even easier.
How To Start First Row Of Laminate Flooring
Conclusion
Starting the first row of laminate flooring might seem daunting initially, but with a little know-how, this step is achievable. This guide provides a clear framework for successfully laying your first row, ensuring that your laminate flooring project gets off to a great start. Take your time, pay attention to the details, and remember, with a little practice and patience, you can create a beautifully finished floor you can be proud of.

:max_bytes(150000):strip_icc()/OrangeGloEverydayHardwoodFloorCleaner22oz-5a95a4dd04d1cf0037cbd59c.jpeg?w=740&resize=740,414&ssl=1)


