Have you ever dreamt of creating a personalized floor plan for your home, but the thought of complex design software intimidated you? Fear not, because a surprisingly powerful tool is already at your fingertips—Microsoft Excel. With a dash of creativity and a few Excel tricks, you can whip up your own detailed floor plans, perfect for visualizing your space, planning a renovation, or even just sprucing up your home décor ideas.

Image: winwin.com.ua
While Excel isn’t typically known for its design prowess, its versatility shines through in this unexpected application. Its grid system, formulas, and visual elements make it a surprisingly capable platform for sketching out basic layouts. Whether you’re a seasoned DIYer or a design enthusiast just starting out, this guide will empower you to unlock the potential of Excel for creating your own personalized floor plans.
Getting Started: The Basics of Excel Floor Planning
1. Planning Your Project: Taking Measurements
Before diving into the digital world of Excel, you need a solid foundation of your real-world space. Grab a measuring tape and accurately record the dimensions of each room, including walls, doorways, windows, and any other permanent fixtures. Note the position of these elements relative to each other, as this will translate directly into your Excel floor plan.
2. Setting Up Your Excel Worksheet: A Blank Canvas
Open a new Excel worksheet. Now, let’s define the scale of your plan. For example, you could represent 1 foot with 1 cell in your Excel grid. This will create a visually accurate representation of your space, but remember to adjust the scale based on your room size and desired level of detail.

Image: carpet.vidalondon.net
3. The Building Blocks: Walls, Doors, and Windows
Now, it’s time to start constructing the basic structure of your floor plan. You can represent walls with solid lines, using Excel’s “Fill Color” option to shade in the area. Doors and windows can be depicted with rectangular shapes, or you can use specialized symbols from Excel’s “Shapes” menu for a touch of visual flair.
4. Furnishing Your Space: Adding Furniture and Features
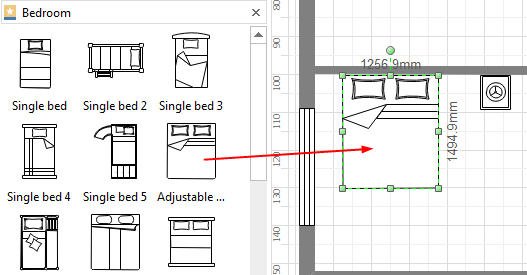
The fun part! Use various shapes and symbols to represent furniture, appliances, and other objects you want to include in your floor plan. Experiment with different colors and sizes to ensure clarity and visual appeal. You can even use Excel’s built-in “AutoShapes” or download custom icons online for even greater variety.
Advanced Techniques: Taking Your Floor Plans to the Next Level
5. Enhancing Visual Appeal: Using Cell Formatting
Beyond basic shapes, you can elevate your floor plan’s aesthetics by delving into Excel’s rich formatting options. Experiment with different font styles, sizes, and colors to create visual hierarchy. For example, you can differentiate room names or descriptions by using bold fonts or contrasting colors.
6. Staying Organized: Utilizing Excel Tables
To keep your floor plan organized, leverage Excel’s powerful table feature. A table allows you to neatly arrange information about each room, including dimensions, furniture placement, and any special notes. This not only improves readability, but also makes updating your plan simpler in the future.
7. Adding Depth and Perspective: Visual Effects and Techniques
While Excel may not be a full-fledged design software, you can still incorporate some visual effects to add depth and realism to your floor plan. One simple technique is to use color gradients for walls or flooring, creating a sense of perspective. You can also experiment with different line thicknesses to highlight specific features or differentiate between different materials.
8. Making Your Plan Interactive: Linking Cells and Creating Drop-Downs
Excel’s versatility doesn’t end with static visuals. You can create interactive elements within your floor plan by linking cells and using drop-down menus. For instance, link a cell containing a furniture description to a drop-down menu with various furniture options, allowing you to quickly change the layout and explore different arrangements.
Showcasing Your Work: Sharing and Exporting Your Floor Plan
9. Sharing Your Floor Plan with Others: Printing and Exporting
Once you’ve created your masterpiece, it’s time to share it with the world! Excel allows you to print your floor plan directly or export it as an image file (like JPG or PNG) for broader sharing. You can also use Excel’s “Copy” function to paste your floor plan into other documents or presentations.
How To Make A Floor Plan In Excel
Conclusion: The Power of Excel in Floor Planning
While dedicated design software offers more advanced features and customization options, Excel provides a surprisingly effective and accessible platform for creating basic floor plans. By harnessing its simple yet powerful tools, you can transform spreadsheets into visual representations of your home, allowing you to plan, organize, and visualize your space with ease. So, grab your measuring tape, unleash your creativity, and embark on your very own Excel floor-planning adventure! If you’re looking for even more inspiration and advanced techniques, explore online forums, tutorials, and templates dedicated to Excel floor planning. Happy designing!

:max_bytes(150000):strip_icc()/OrangeGloEverydayHardwoodFloorCleaner22oz-5a95a4dd04d1cf0037cbd59c.jpeg?w=740&resize=740,414&ssl=1)


