Have you ever looked at your wood floors and thought, “These need a good cleaning, but they seem to have a film on them?” That film is likely the result of years of wax build-up, which can leave your floors looking dull and lifeless. Whether you’re tackling a newly inherited home or simply taking on a neglected room, removing built-up wax is a necessary step in restoring your hardwood floors to their natural shine. But worry not! Removing wax is a task you can successfully take on yourself – you just need the right information and tools.

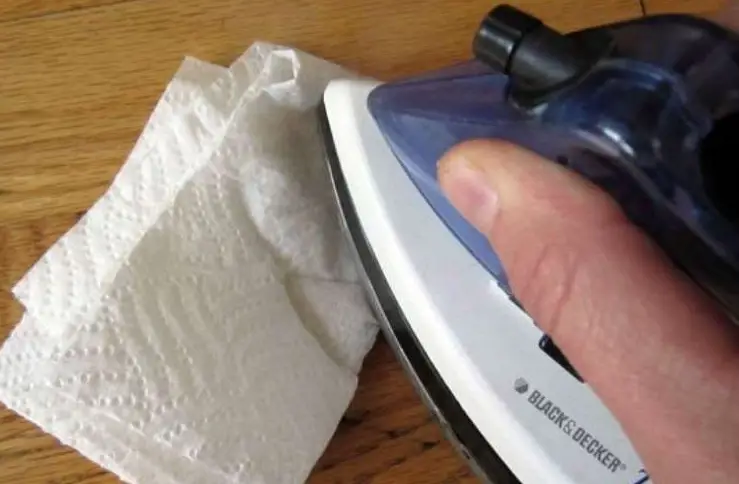
Image: howtowaxguide.com
This comprehensive guide will equip you with the knowledge to tackle wax removal safely and effectively. We’ll walk you through what kind of wax you may be dealing with, the different removal methods, and offer handy tips along the way. By the time you’re finished reading, you’ll be ready to restore your wood floors to their former glory, revealing their natural beauty and warmth.
Understanding Wax Build-Up: The “Why” Behind Removal
Wax build-up on wood floors often occurs over time due to repeated applications, especially when it hasn’t been properly removed between applications. This layering effect can create a thick, cloudy film that masks the natural beauty of your wood. It can also trap dirt and grime, making your floors appear dirty even after cleaning.
Beyond aesthetics, wax build-up can also pose practical problems:
- Reduces Floor Shine: A thick layer of wax hides the natural grain and sheen of your wood floors, leaving them looking dull and lifeless.
- Traps Dirt and Grime: Just like a thick layer of dust on any surface, wax can trap dirt and grime, making it harder to clean and leaving your floors looking dirty.
- Creates a Slippery Surface: A thick layer of wax can make your floors slippery, especially for children and pets, increasing the risk of falls.
- Can Harden and Crack: Some types of wax can harden and crack over time, especially if they aren’t properly maintained.
- Interferes with Refinishing: If you plan to refinish your wood floors in the future, you’ll need to remove all traces of wax before applying a new finish.
Choosing the Right Removal Method: What Works Best for You
The method you choose to remove wax from your wood floors will depend mainly on the type of wax you are dealing with and the condition of your floors. Here are some of the most common types of wax you might encounter:
1. Paste Wax: A Classic Choice
Paste wax is a traditional wax that has been commonly used on wood floors for decades. It usually comes in a can and is applied with a cloth or brush. Paste wax offers a natural shine and can help protect your floors from scratches and spills. However, it can build up over time, requiring periodic stripping to remove the build-up.

Image: mromavolley.com
2. Liquid Wax: Fast and Convenient
Liquid wax is a more modern option that’s typically applied with a spray bottle or mop. It dries quicker than paste wax and offers a good shine, but it can be more prone to build-up if not properly maintained.
3. Polyethylene Wax: High Shine and Durable
Polyethylene wax is a high-shine wax that’s used in professional floor care. It’s very durable but can be more difficult to remove than other types of wax. Its high-shine finish has also led to its use on furniture and other surfaces.
4. Acrylic Wax: Easy Application, Versatile Choice
Acrylic wax has become increasingly popular in recent years due to its ease of application and versatility. It can be found in liquids and as paste wax. It dries quickly and creates a smooth finish, but it may require more frequent removal than some other types of wax.
Once you’ve identified the type of wax – or, if you don’t know, if you’re applying a solvent to a small area first is a good idea. Start with a less aggressive solvent and work your way up if it’s not strong enough.
Safely Removing Wax: A Step-by-Step Guide
Regardless of the method you choose, be sure to test any cleaning solution on an inconspicuous area of your floor first to ensure it doesn’t damage the finish. Also, always wear gloves and protective eyewear when working with chemicals.
1. Prepare Your Floors
Before you start removing wax, you should vacuum or sweep your floors thoroughly to remove any loose dirt or debris. If any dust bunnies or bits of debris are still present, they will spread around with the cleaning solutions, making it more difficult to remove the wax. Vacuuming is an excellent choice, as sweeping often can scratch the wood floor.
2. The Right Product for the Job
There are several different cleaning solutions that can be used to remove wax, each with their own strengths and weaknesses.
Solvent-Based Removers:
Solvent-based wax removers are the most effective options for removing stubborn wax build-up, but they can be aggressive and should be used with caution. Choose a remover specifically designed for wood floors, as using a remover meant for another surface, like vinyl, could damage the finish. They’re often available in stronger, more concentrated forms for tough situations, as well as ready-to-use, pre-mixed options for lighter applications.
Alkaline Removers:
Alkaline removers, or “wax strippers”, are a safer alternative to solvent-based removers, particularly for older floors or those with delicate finishes. They are often less potent than solvent-based removers but are gentler on your floors, especially those that have been treated with an oil-based finish, as solvent-based removers can dull their shine.
3. Apply the Cleaning Solution
Once you’ve selected the right cleaning solution, apply it to the floor according to the manufacturer’s instructions. You can use a mop, sponge, or cloth to apply the solution.
You may need to work in sections, allowing the solution to sit on the floor for a few minutes before scrubbing. When applying the solution, avoid saturating the floor. Let the solution do its work, but don’t allow it to dry completely or it can leave a residue. The manufacturer’s instructions will offer the best guidance for this step.
4. Thorough Scrubbing
Once the solution has sat on the floor, scrub it with a brush or mop to loosen the wax. Work in sections to avoid the solution drying on the floor. Continue scrubbing until you’ve removed all of the wax. If the wax build-up is particularly stubborn, you may need to repeat this step multiple times.
Don’t forget to use a clean cloth, and be sure to rinse the cloth frequently to avoid reapplying the wax. The best tool for scrubbing will often depend on the size of the area. A floor scrub brush is often an excellent option for large areas due to its wide brushing surface. For smaller areas, a hand brush can be preferable.
5. Rinse and Dry
Once you’ve removed the wax, thoroughly rinse your floors with clean water. Make sure you remove all traces of the cleaning solution, as this can also leave a residue on your floors. You can use a wet vacuum or damp mop to rinse your floors. A damp mop is a good option as it allows you to easily mop small areas in your house without having to fill up a larger wet vacuum.
Once you’ve rinsed your floors, dry them thoroughly with a clean towel or cloth. A squeegee can be used to quickly dry larger areas as well. Never leave your floors wet for an extended period, otherwise, they’re susceptible to warping or other damage. You may need to allow the floor to air dry completely before proceeding.
6. Finishing Touches (Optional)
Once your floors are dry, you may want to apply a new layer of wax to protect them. Choosing the right wax for your floors can be an important step at the end of the process, as it can help protect your floors and enhance their natural beauty.
Tips & Tricks for Success:
Here are a few additional tips to make the wax removal process easier:
- Work in sections – Instead of trying to remove wax from your entire floor at once, break the job down into manageable sections. This helps prevent the cleaning solution from drying out too quickly and makes the process less overwhelming.
- Test a small area – Before applying any cleaning solution to your entire floor, always test it in an inconspicuous area first to ensure it doesn’t damage the finish.
- Ventilate the room – Ensure adequate ventilation when working with cleaning solutions, especially when working with solvent-based removers due to their fumes.
- Protect your furniture – Protect your furniture and other belongings from spills or splashes by covering them with drop cloths or plastic sheets.
- Choose the right tools – The right tools can make all the difference when removing wax. Select a mop, brush, or cloth that’s appropriate for your floor type and the cleaning solution you’re using.
- Patience is key – Removing wax can take time, especially if you have a lot of build-up. Be patient and take your time, and your floors will thank you for it.
How To Remove Wax On Wood Floors
Conclusion: A Resplendent Floor Awaits You
Removing wax from wood floors can seem daunting, but with the right information and tools, it’s a task that anyone can tackle successfully. From understanding the different types of wax to choosing the appropriate cleaning solution and following the steps outlined above, removing wax is a process that will restore your floors to their former glory. By removing wax build-up, you can reveal the natural beauty of your wood floors, create a cleaner and safer environment, and set the stage for future protection and maintenance. So go ahead and embark on your floor revival journey; a shiny, beautiful surface is waiting for you!

:max_bytes(150000):strip_icc()/OrangeGloEverydayHardwoodFloorCleaner22oz-5a95a4dd04d1cf0037cbd59c.jpeg?w=740&resize=740,414&ssl=1)


